About Me

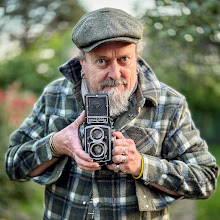
My photo
Professional Photographer, Model Maker, Writer & Pretend Musician

30 December 2008

Carter's Siding - bit of armchair pontification?


Just a bit of messing about to see what could be plonked on a sheet of 3'00" x 1'00". 'Carters' Siding was a clay pit off the truncated Corfe Mullen to Wimborne line on the former S&D, the route being severed in 1933.
The remaining 1 mile long siding from Corfe Mullen Junction served the clay pits until 1959, and then wagon storage until 1965 - the rails finally being lifted in 1968.
This quicky was knocked up in MS Paint, in reality it will be on a curve (which is rather beyond MS Paint). The truncated line ends on the left. The bridge on the right could be double track width with a new extra portal for the siding. The narrow gauge will be around 3 inches higher than the standard gauge siding on the ofreground.

In reality AFIK there was no loop, the loop here is just to jazz it up a tad. As I say, this is only a bit of armchair pontification (but so was Catcott)!
Update: Wednesday 31 Dec
Through photography eyes, the main gripe I have with this one is the double track +1 (for the siding which will be an additional 'later' portal) is that the cassette yard will be too visible through the bridge on the right. This common problem is noticed when photographing layouts - mirrors can take care of that for snaps but tend to get in the way of moving trains!
Since toying about yesterday, this has come to fruition of Carter's Siding (proper name was Corfe Mullen Siding) courtesy of that Google thing...http://www.trainweb.org/railwest/railco/sdjr/cmj.html#CMS
The siding was only long enough for 5 wagons which is great for us, but sadly no loop. If I wanted an accurate rendition, because the end of the line was to the left, trains had to run past, then shunt back into the siding - this means I'd need around 4 to 5 feet length which defeats the object of this project.
The sketch book is out again for some more armchair pontification, with this morning's below....

Another thought is a 3 foot module to join up to Catcott's right hand side (or stand alone using Catcott's fiddle yards) allowing trains to run right through, this time featuring the 'Eclipse Peat Works'. This could be interesting in that the narrow gauge feeder ran over the standard gauge http://www.sdjr.net/locations/ashcott.html , then over the canal which by this stage was on the opposite side of the line from Catcott over to a series of corrugated huts for the peat works. Narrow gauge wagons went up some kind of rickety wooden structure to load their content into wagons on the single standard gauge siding. Modelling something like this would be interesting too http://www.british-history.ac.uk/image.aspx?compid=15115&filename=fig57.gif&pubid=62
Whatever happens (if ever) presentation with be the usual black box 'house style' with built in lighting and curved backscene so as to blend in with existing projects...

24 December 2008

Merry Christmas & a Happy New Year!


To all the readers and viewers who have passed on support and nice comments over the last year about my miniature bodgings and meddlings.
May next year push the boundaries and that all important fun factor one stage further!
Chris

22 December 2008

Noch! Noch! - Enter the Gras Master!


Furthering Cement Quay's look before its show in Guildford on the 17th Jan 2009, the other day saw the purchase of the highly acclaimed Noch Gras Master from the excellent Gaugemaster at Ford near Arundel.
The Gras Master is a useful tool for applying static grasses to model layouts and dioramas, the 'static' feature making the 'grass' fibres stand upright as they land onto the surface of the layout.
Tests so far have proven very effective, as hopefully the pictures here will demonstrate with the Noch fibres blending in very well with the existing Silfor grass matting.

I think the days of ground foam scatter replicating grass rather badly from that well known manufacturer beginning with 'W' and others are truly past their sell by date on the realism stakes.
However this new found realism does come at a price, with the recently introduced Gras Master 2 coming in at just over a ton. To put it into proper perspective though, it's only the price of a couple of new locos and most of us have too many of those anyway, so I consider it money well spent - it doing far more for your layout than those new locomotives.

12 December 2008

Free Scenics!

In preparation for what will be Cement Quay's first outing in a year at the Guildford Show on Saturday 17 Jan 2009, a little time yesterday afternoon was spent upgrading things a little.

A rummage on our lawn sourced some moss which I felt had some scenic potential. After few hours in the airing cupboard overnight to dry out, little bunches of the stuff were stuck down then sprayed with a PVA/paint and water mix to strengthen, preserve and darken the colour a little. The tips are then painted mauve to look a little Budliah/Rose Bay Willow Herby using some cheap acrylic from Tesco.

Some of that modelling is very wonky from this angle - ah, it's all just slipping into the Severn, well that's my excuse anyway.....

07 December 2008

Layer stacking in Photoshop CS3 for increased depth of field


I had a bit of spare time overnight, so read up on the rumour that similar effects to Combine ZM for bodging an increased depth of field can in fact be done in Photoshop CS3.

You need the 'extended version', and you might find this link useful
http://wiki.panotools.org/Image_Stacking

The link above mentions 'Smart Objects", which for my tests were quite the opposite (though I'm sure everybody else will do better).......

The below worked for me and tests so far have proven to work well for for images where you only have two layers (which to be honest is fine for many pictures, more will work I'm sure, but will of course increase the amount of selective layer deleting needed). It also had the advantage in that CS3 lined up slightly misaligned images (ie when a bean bag was used rather than a tripod which can result in rotational errors) somewhat better than Combine ZM. You do have to manually delete the out of focus bits from the top layer using the eraser, this does mean that you don't end up with those odd looking blurred areas where Combine ZM didn't know what to do (Combine ZM does the whole caboodle, but for me has been a little hit and miss depending on shot).

1/ >File
2/ >Scripts
3/ >Load Files into Stack
4/ >Browse and choose images
5/ >Tick the align by comparion check box (not the Smart objects one).

Leave to chunter away for a minute or so, you then get a multi layered file which can be saved as a PSD or layered TIFF.
With the eraser tool (E), ideally with a soft edge delete the out of focus bits from the top layer (this is actually quite quick).

Save as PSD or flatten and save for the web or whatever.

Unlike with Combine ZM you don't lose EXIF, colour space and an end up with an odd 96 dpi screen res (300 would be a better default) which you might need to add again. It also works in 16 bit and straight from the camera RAW files (which 'ZM won't do) which a bonus too.

The shot above taken on a Canon G9, was combined from two shots (one focussed on the foreground and one one the engine) with the camera resting on a bean bag, which in turn was resting on some stock boxes. Previous attempts with Combine ZM created some odd misregistration results on the left hand side, however, using CS3 as above worked perfectly, the stack creation twisting one of the images slightly to solve the previous problem. The whole fiddling about from RAW file selection, through grading and selective deleting of out of focus bits right through to resizing for web took around 10 minutes.

06 December 2008

Back to the Future with 35mm Film!

Late last week, in this world of 'only digital will do' I was starting to feel rather sorry for my old much film starved Nikon FM 35mm film SLR gathering dust on the office shelf. A day or two later, & much to my surprise I was still able to buy a roll of B&W film called Ilford XP2 - which can be processed down the local 'Kwikkysnaps' on their C41 processing line.

In the 'old days' I'd have processed my own film at home, but of course in this brave new world we live in, like many ex darkroomers, my redundant processing gear is likely to be lining some landfill site in India or other foreign clime - illegally dumped courtesy of our law abiding councils - or so we are led to believe if we take notice of the popular press!

OK, back to the all important film, the camera back opening almost by magic as the hungry outmoded technology grabbed the 35mm canister off me. The lucky subject of the old girl's attentions would be Catcott Burtle, my new layout/diorama. Soon I was snapping away with the reassuring rasp of the manual frame wind on and unmistakable ker-thunk of the shutter going off - 38 times in total, remembering of course that you can always squeeze on a couple of extra shots onto a roll of 36!

The following day the roll of film was dropped in at the local lab and after a coffee at Starbucks I ventured home with some strips of processed negatives for the princely sum of £3.50.

Rather than being totally analogue, I decided to merge this 'old tech' with 'the new' and digitise the files with a scanner and 'process' them in Photoshop, of course the simpler option would have been for the lab to make me up a CD! That's just too easy!

In the 'olden days', after wet processing the resulting prints, it's likely you'd have used Indian ink to retouch the odd white spot or scratch, now of course we simply use the various retouching tools in Photoshop with great effect and speed. We can then prints them off at home on the ink jet or post them to the internet. Of course, the other option would be just to get prints made at the time of processing - dust specks and all! Nah, that's just not me, that’s far too easy!

Tech: Nikon FM, Nikkor 18-35 IFED, 4 sec @ f22. Ilford XP2 b&w film scanned to digital via and Epson 4870 @ 3200 dpi (resized for web here).

25 November 2008

Made in the Isle of Wight

Resting in the siding at Catcott and fresh off the modelling bench, is this delighful resin based kit from the Isle of Wight based 'Smallbrook Studio' depicting a 10 ton LSWR brake van.

I'll be covering the contruction of this in a future edition of Hornby Magazine.

16 November 2008

Rosebay Willow Herb

With Rosebay Willow Herb blowing in the summer breeze by drain at Catcott, Mickey Mouse tank No. 41248 trundles past the crossing with an empty perishables train from Templecombe to Bason Bridge.......

14 November 2008

Cinnabar Red

Here we go - after a couple of days blasting around the country snapping trainsets and a few beers with mates in the northwest, this afternoon at home, the Ian Kirk 51' LNER full brake received a coat of 'Carmine' (British Leyland MG Metro Cinnabar Red), some numbers, weathering (dry brush and washes - not too much for this) and a top coat 'Krylon Matte Finish' via aerosol (Search Ebay for a good supplier). To be added: vacuum pipes, scratch built fom some brass wire wound with a single fine strand of stripped layout electrical wire are drying on the workbench after their top coat of matt black. That will just leave screw couplings to source next time I find a proper model railway shop.

11 November 2008

Building a 1970's style kit.........


OK, moving on, in my quest to improve, introduce and upgrade some of my steam era stock before Catcott Burtle' s next outing at RAILEX next May......

Here we have coffee table job (note the hot pepper sauce for the boy and handcream for her indoors on the left) bought last weekend at WycRail, an Ian Kirk, aka Coopercraft LNER 51' 1-1/2" Full Brake is now on the modelling bench. This item of stock will form part of a milk and or perishables consist.

The basic body, roof and ends are great! The underframe, bogies and such are very flaky misaligned tired mouldings sadly in black (grrr, so they're tricky to tidy and assemble 'cos they're difficult to see the relief on - 'grey is the only way' don't you know?) and needed a bit of beefing up here and there to ensure they'll last more than 3 minutes.

Here we are so far awaiting a few more additional bits in the neither regions. The lower detailing was all a bit of guesswork, the instructions being more like a secret quiz that only the writer/designer understands. Anyway, got there in the end even, if I did replace the battery boxes with something more useable (block of foamboard)! The body will be lined maroon (Halfords British Leyland Damask). Sourcing pics has been a tad tricky despite looking all over the place (bar actually buying the recommended book 'LNER Gresley Carriages' which is unlikley to see much further use).
Numbers indicated on the paperwork suggest various from 70070 up to 70564 depending on versions. I guess for BR days one would put an 'E' on either end of this?

05 November 2008

The Art of Illusion Without Photoshop

I have a job next week to photograph 60 or so OO gauge locos. So, rather than use a length of Peco like everybody else on a bit curled up white paper, I used a sheet or two of foamboard, a length of C&L and some spare Silfor grass matting, carpet underlay, hanging basket liner and various dyed sawdusts. This all combined has hopefully resulted in a niftly display photo platform which also gave me the chance to mess about testing out some autumnal looking scenics.
Here you see the result of about 6 hours work. Oh yes, the print is one of my skies run off to 20x30 inches at Photobox online lab, which means no need to mess about with jiggery pokery adding skies and such 'cos everything can be done in camera - result?


29 October 2008

Keep Radstock Connected

Radstock is at grave risk of losing its hibernating rail link to the National Rail network due to possible redevelopment of the Radstock site.

Please sign the Restoration of the Radstock Rail Link Government petition without delay!


http://www.gopetition.co.uk/petitions/restoration-of-frome-radstock-rail-link.html

Fingers crossed, the economic climate may for once actually be in the railway's favour, with developers being unable to raise the required loans to purchase land and build properties that may drop in price!

The picture above taken by Malcolm Snelgrove, is of the former SDJR station which was demolished in the late 1970's. For more pictures of this and other SDJR stations, please follow this link.

21 October 2008

A Hint of the Titfield Thunderbolt

A motley departmental train trundles through Catcott Burtle hauled by Radstock's 'Jinty' No. 47276. Something tells me this train is not quite legal with unfitted stock between the carriage and engine!

Engineer's Carriage

The Midland Railway suburban carriage (from a Ratio kit) now all painted up and weathered with some dry brushing of pale grey (Humbrol matt enamel) and washes of muddy earthy colours (household emulsion). All this was sealed into place with 'Krylon Matte Finish' from an aerosol (Google for a supplier). It still needs screw couplings, vacuum pipes and glazing. The glazing will be a bit of a chore, because I'll have to cut out each window seperately due to the rather thick sides.

20 October 2008

1981 Workbench

was looking through some stock boxes in the garage (building new stock boxes so I can junk the old ones) the other day and came across this. As teanager I recall building the body from scratch using card in about 1981 from some plans in one of the mags. I presume it's a Midland Railway van. I'm tempted to give it a refurb and to put it into departmental use. The rust on the wheels is real BTW!

Beaconsfield MRS Show, 4 Oct 2008

Catcott Burtle performed remarkably well, with only one actual prod needed with about 20 mins to go. The little Johnson 1P 0-4-4 rebuilt by guru Philip Hall was at total dream to run - it not missing a beat all day, and so smoothly too! In the evening the layout took a round trip via north Bucks to the outlaws, with the result that we have only just returned home.

Much to my surprise the layout is all in one piece behind me all lit up and dandy, this will mean I can get on taking it to the next level (further detailing and tweeks etc) rather than having to fix things that broke. One thing I will need to do is to put some locating pins or velcrow between the base of the layout and the trestles to stop it drifting about in top of them which it did a couple of times! This was on my list to do prior to the show but alas I ran out of time.

I hope to be able to use the same trestles and drape for Cement Quay which is next out on Sat 19 Jan 09 at the Astolat Guildford show (one day show). This will raise Cement Quay's height from its present 3'6" to 4'2" which should imrove the viewing of the diorama type of approach to this layout.

02 October 2008

11th Hour at Catcott Burtle

With Catcott Burtle about to hit the road for the very first time this coming weekend (Sat 4 October) at the Beaconsfield show, a little time was spent sorting out the allotment opposite the crossing keeper's cottage.

Here goes: Sweet peas/beans supports were bits of wire soldered up and painted. Onions (or leeks) are dyed hemp stuck into holes (as used for the reeds on the nearby drain). Strawberries (or such) simply Heiki foliage. Woodland Scenics would be just as good. Dab of paint here and there. Same used for the beans/peas. Slug eaten cabbages are little squares of printer paper (1x1cm) soaked in greeny brown acrylic (cheap set from Tesco) squeezed and rolled into balls whilst wet. Mucky job. Loose earth is Treemendous 'real earth' courtesy of some geezer called Marriott.

05 September 2008

Reflection

The top shot of Catcott Burtle shows the original concept from July 2007, this illustration being from a Photoshopped pencil sketch knocked up during an idle moment.

The lower shot shows how the project has actaully come to fruition, for once actually not too far off track for a change. I suppose this project is none too complicated from a design point of view.

No computer jiggery in the lower shots of the actual layout. This is something I wanted to achieve after adding fake skies to the dozens of layouts photographed over the last year or two. Catcott, I hope will be successful in giving the exhibition goer the same experience as the one normally reserved for the printed page............

Looking ahead, as this tiny layout gets to stage of completion, where should I go next? My model making currently covers 3 areas; 009 narrow gauge, modern image and this transition era scenario. I suppose would probably be an idea to use one of the three so as not to have to build more stock ....

01 September 2008

Rust, rust and more rust .....


Here are a couple of Bachmann 16 tonners picked up the other day. 'Before' and after about 90 mins work with 'sleeper grime' applied with a small paint brush - a dollop here, a dollop there, until it's everywhere. It was then washed over with various shades of matt emulsion paint in colours you'd never buy for interior decorating - unless you are goth or manic depressive.

Inspiration here http://gallery6801.fotopic.net/

23 August 2008

The old car

My other interest is old cars; here's my rebuilt 1978 MGBGT posed near the railway bridge at Totter's Lane in Hampshire, whilst on one of my jaunts out to photograph the real thing.
I've had this car for 10 years now. In that time it's had a full mechanical rebuild and respray in Carmine Red, the car's orginal colour. This smart car has also had several other modifications to make it more suitable for today's faster roads.

Sunny South Special?

Sporting a rather jolly 'Cathedrals Express' headboard on what is in fact 'The Sunny South Special', No. 6233 The Duchess of Sutherland is captured powering past Coxes Mill near Addlestone on a not so sunny Wednesday 13 August 2008.

Let's Fiddle

Catcott Update

OK, about 2 hours work today got the whirlygig fiddleyard baseboards together. Here they are in all their glory in approximate position without 360 deg sector plates - seen here held together with masking tape and various bits from around the house whilst the glue sets. The sides will be finished off with 3mm ply as with the layout baseboard. I might surface the boards with something soft like felt. The layout is minus lighting pelmet and crossing keepers cottage here. The boards will take a 4-6-0 loco and 2 Mk1's length wise - quite long enough for a small layout like this (5 foot). They're basically A1 in length - the size of the foamboard!

Crossing Keeper's Cottage

Catcott Update
A shot of Catcott crossing keeper's cottage showing the revised sash windows and fence. The foreground will be home to an allotment (bamboo runner bean supports have been soldered up and are awaiting some paint and bean plants). And yes, that guttering does need some adjustment again........

Asparagus!

Catcott Update

As an alternative to plummer's hemp after a visit to my sister's allotment, I came across some asparagus plant tops. Reeds -bingo! OK, a bit of colour correction needed, no problem. They dried easily and are pretty flexible, though a splash of PVA in the yet to be airbrushed on colour adjustment won't do any harm. The rhyne bed will be repainted and recoated in PVA in due course though the paint splashes do look a little like stuff you seen in stagment canals etc.