About Me

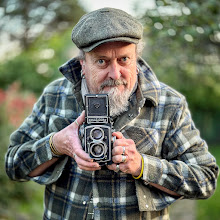
My photo
Professional Photographer, Model Maker, Writer & Pretend Musician
Showing posts with label photography. Show all posts

03 September 2017

60 Years Ago

60 years ago today, Johnson 1P No. 58086 departs Combwich through an early morning late summer mist. This loco sadly was withdrawn just 2 years later. What a shame none survived in to preservation.

The model is one of the very few brass kits I've built, this one being by the Craftsman range. It has January 1982 scratched on to the underside.

I believe one of the ready to run manufacturers has one planned for the future, which will no doubt make this model look rather crude. This will run better though, I had the chassis commercially rebuilt for me by a 'man who can' a few years ago, and now it runs a dream all day long.

Click on the above photo for a bigger version.

13 December 2012

Into the Sunset

nevard_121212_Q1_IMG_1961 by nevardmedia
nevard_121212_Q1_IMG_1961, a photo by nevardmedia on Flickr.
In the last rays of sunlight during the autumn of 1963, Guildford Shed's 'Cofferpot' No. 33019 briefly lets off a good clag as it heads west after a water stop at Basingstoke.

Those who follow me on Facebook will have seen this photo, I find it like with this blog a useful tool to show off photos, especially now that the new Facebook layout allows much bigger less compressed photos to be displayed.

This photo seeing I don't have a time machine is one of my frequent lash ups in the studio using the customised Hornby Q1 I discussed in my last blog post earlier in the week. The photo took about 5 minutes to set up and shoot, just using a single light source off to the left with the angle allowing light to reflect off the loco straight into the lens. The sky and smoke; I have to confess to using  Photoshop to laminate an early morning West London summer sky and smoke from a full sized GWR Pannier tank taken on some photo-charter a few years ago.

Purists would of course take their model outside in the correct weather and photograph it against the sky 'live', they'd then hide behind the loco smoking a cigar puffing smoke upwards. But no, it's too cold and I don't smoke, so prefer this method especially for this time of year!

03 December 2012

Black & White


Brewhouse Quay; the strong graphic quality means
that colour would add little if anything. Red and yellow
channels were lightened a little during B&W
conversion to add mid tone contrast to replicate how
B&W film would record such a scene.

 CLICK TO ENLARGE!
If you look on model railway internet forums it's common to see dull flat photos of toy chuffers in black and white. Apparently to many forum-flies, many layouts and modelling 'look more realistic', but hits on my website when I publish both colour and B&W of the same photo would tend to suggest that colour always wins on the 'hit' front by around 2 to 1.

I think much of the time why modellers prefer B&W to colour is because their white balance is so far out, so converting that shot to monochrome gets around that issue. We've all done it I'm sure, especially if trying to shoot something at a show with all the mixed lighting casting different colours on everything, or if you're a bloke, simply not reading those new camera instructions to work out how to set the white balance!

Tip: shoot RAW and write your white balance later at home if your camera allows!

Very occasionally I do get that shot which gets more B&W hits than colour, this is probably something to do with the lighting and composition. Those shots tend to have a strong graphic quality, any colour adding little or no value. Luckily these lazy days we can make that choice in the virtual darkroom at a later stage. But if shooting a B&W shot specifically, it's always good to 'see' in B&W at the taking stage, concentrating on those aspects that make a B&W shot work by ignoring the colour aspect. Google Colin Gifford or Bill Brandt and you'll see what I mean.

Tide out at Le Touquet - originally a colour shot, but the
blue channels darkened and yellow channels lightened during
B&W conversion to replicate the effect of B&W film shot
through a red filter. CLICK TO ENLARGE!
Many think that turning a digital colour photo into B&W is simply a matter of converting the image to 'greyscale'; of course you do get a B&W image, but it will often look muddy, lack contrast and the tone separation between what were originally the coloured areas like duotone carriage liveries (especially 'blood and custard'). This is because B&W film, even though it is monochrome does see colour and records it differently to a simple grey scale conversion. In the days of B&W film, photographers would exploit this aspect further by adding coloured filters to their camera lenses to produce differing effects.

The most popular filter was yellow, the yellow filter brightening yellows and green in a landscape (or the yellow end to a loco) and darkening the blues, great for a summer days when wanting to separate the fluffy white clouds from the blue sky. For more extreme effects orange or even red filters could be used, red in particular darkening the blue sky to almost black and lightening the yellow/red end of the spectrum to make these colours appear white in monochrome. For railway photographers this could give the most most bazaar effect to a BR Blue loco on a sunny summer day!
A Midland 3F on Catcott Burtle, originally in colour, as before
the  yellow and red channels were lightened a tad and the
 blue channel darkened a bit at the B&W conversion
 stage. The effect is similar to what you'd get shooting outside
 on a summer's day with a yellow filter on the camera lens
when using B&W film. A simple grey scale conversion of the
 colour photo would be lacking in contrast in the grass and
 sky, yellows and reds in particular becoming far too dark and 

muddy during a straight greyscale conversion.
 CLICK TO ENLARGE!
In the wacky world of digital, you can do much of the above with your editing software by adjusting the colour intensities when B&W converting. I'm not going to tell you how here, but have a quick Google on the subject and try for yourself, you'll never be satisfied with a simple grey scale conversion ever again and may even get that rare shot that's more popular in B&W than colour.

To celebrate B&W in miniature, I have created a Flickr collection of some of my favourite B&W shots - they can be found here.


Photo for Monday

Monday is often a miserable day for those in the 9-5 rat race, so hopefully this photo of my 30 year old LMS 4F will add a little cheer to the gloom. But listening to the news as I type type would suggest that today will be the busiest day for internet shopping - so hopefully you've put that order in for the rolling stock or book you need for that latest project.

The above photo was taken at around 05.40 (don't ask) this morning, I have the photographic lights set up around Cement Quay currently so it was just a matter of turning them on and popping the Box Brownie onto a small bean bag to grab this view as if one was afloat on the water without a paddle.

08 November 2012

View from the fiddle yard

nevard_121108_BQ_IMG_1385 by nevardmedia
nevard_121108_BQ_IMG_1385, a photo by nevardmedia on Flickr.
I'm always keen to try out new angles on my layouts, and it's after exhibiting Brewhouse Quay at Wycrail last weekend became aware of this never before tried view from one of the other fiddle yard exit points on BQ when messing about at the show with a camera. In fact unless one has a really small head it's not possible to see this, but today's little high quality cameras can get into all sorts of places- ohhh errrr.....

Note how the canopy has been cut back over the years, the most recent modifications since the local take over of local line by the BR Western Region with their even bigger locos. Well, that's my story, but in reality I should have mounted the building a tad higher! Still, this osrt of thing happened in eal life!

30587 after residing at Eastleigh for a few months in 62/63 after finishing on the Wenfordbridge line, ended shunting Brewhouse Quay sidings until the late 1960's - its short wheelbase and nimble frame being ideal for this little known brewery railway network. Shortly after this photo was taken, the engine was painted green, lined out and named 'Mashtun'.

30 October 2012

Boys' Day Out


Lots of clag as 60069 eases its load into the loop
at Westerleigh. More pics here! 
 Late last week as a break from toy trains I went on a jolly snapping trains with the good company of Tony Callaghan, Mark Bearton, Ian Chancellor, Chris Perkins, Richard Lewis and Tom Curtis.

The weather started off dull, misty and wet at our rendezvous of Pilning, but digital photography doesn't really get handicapped with this sort of weather, and if anything van produce more interesting results than sunshine.

After Pilning we nipped over to Westerleigh fuel terminal between the Bath and Bristol M4 junctions. It was hard to imagine that once upon a time the Pines Express and other long distance expresses thundered through here on this old Midland route on their way to Bristol, Bath, the Somerset & Dorset Line and beyond.

At Westerleigh the incoming train was running late which was delaying the outbound train, this presented us with the sight of two long trains at the terminal - double fun for spotters!

We then rounded up the day a mile of two north at Ram Hill, Coalpit Heath. This area historically was the centre of the south Gloucester coal field, with the last pit, Froglane Colliery closing just after the last war.

And now the photos from those of use that have websites:

See BREWHOUSE QUAY at Wycrail this weekend

26 October 2012

Canon G12

Photographing model railways is a bit of a niche subject and requires odd techniques to get the best results. For proper commissioned shoots I use professional Nikon DSLR gear and studio lighting, but sometimes a tiny camera is needed for those hard to get and low angles when the more usual DSLR is simply too bulky.

For some time for this purpose I've used a little Canon G9, which has lots of manual control, the all important RAW capture delivering results good enough for a published double page spread. But after 20.000 frame the little G9 has finally expired so a replacement was needed quickly in the form of the highly regarded Canon G12.

The little camera arrived about an hour ago so I thought I'd better quickly put it through its paces, and here are my initial thoughts.

The controls are the same as with the G9 so I was able to set up my custom own custom settings of self timer and other bits that waste time setting up from scratch; Macro, IS off, 80iso, RAW.

Observations are as follows.

The wide angle is good, it equates to a 28mm which gives a good depth of field without focus stacking at f8 and offers a wider angle of view if needed. It delivers a far greater depth of field than the old G9 at the same f-stop at the widest zoom setting (G9 equates to 35mm). This will save time in post prod much of the time and of course disk space storing all those RAW files used for making up just images if focus stacking.

Shooting RAW for maximum quality and processing in Adobe Photoshop CS5, image quality wise has maybe tad lower noise than the G9 at base iso (80), but the lens has greater diffraction at f8 than the G9, so a little more sharpening is needed which in turn ups the noise, thus negating any real difference. But it is very acceptable and should be OK for DPS with good technique.

High contrast objects towards the edge of the frame suffer quite severe chromatic aberration (colour fringing), but this can be totally eliminated at the RAW processing stage buy ticking the C/A tick box in the RAW convertor, one of the reasons for shooting RAW and converting to JPEG later. You'll need full Photoshop, not PS Elements to be able to do this.

Another tickbox in the Adobe RAW convertor gets rid of the barrel distortion seen on straight lines towards the edge of the frame, this is only really an issue with architecture and a feature of all small camera zooms.

Conclusion for those thinking of upgrading:

For G9 owners;The extra wide angle is very good, but that's the only real difference. Image quality wise the difference is not really apparent enough to justify an upgrade (unless the camera is broken!)

G10/11 owners:Save the pennies and wait for the next model, or go for a G1x (but useless macro for model makers), or change to a DSLR.

General conclusionsThe multi-angle screen is a winner and will save bending necks too much.

Better video in the form of proper 16x9 which is compatible with TV set aspect ratios. 720p is not full HD, but will offer better res than SD and more than adequate for good online streaming. If you're buying just for the video, you'll be better with a bespoke video camera or DSLR which will offer far more control when recording.

03 August 2012

Brew Moon!

nevard_120719_DSC_7298moon by nevardmedia
nevard_120719_DSC_7298moon, a photo by nevardmedia on Flickr.
Here's a real chocolate box one (alcohol filled ones I think) of Brewhouse Quay after dark. I'm messing about with some cool LEDs as part of a feature I'm writing on lighting a layout to portray night time scenes. To the naked eye they look like moonlight, but the camera when set to a 30 second exposure records them like the below when I shoot in a totally blackened out room! This is a good example of how a camera can sometimes distort things. If I desaturate the image I'm sure I could match what the naked eye sees - but I quite like the effect!

The moon and smoke is the only computer farty stuff, but it's given me an idea to project a moon onto the 14 inch high backscene maybe - if I can work out how! The moon by the way was that 'supermoon' of a year or two ago.

18 June 2012

Combwich - 30 years ago!

8104_stogursey_003_01 by nevardmedia
8104_stogursey_003_01, a photo by nevardmedia on Flickr.
Combwich is a lot older than most people think, the baseboards and track dating back to 1980. It was originally called Churchstanton, then Stogursey and finally the present Combwich when I rebuilt it in 2001-present.

The layout is still very active, in fact it's better now than it's ever been:

http://www.flickr.com/photos/nevardmedia/sets/72157630183211760/with/7397034112/

Most of the stock seen here is still in regular use too over 30 years on. The signal box has moved 3 times, and some will spot the change of roof too!

The track plan showing things are they are now, hopefully it will help place things.
Seeing these pics, which are neg scans is like going down memory lane, especially because most of them were never printed. On a couple of them I have been able to digitally remove my teenage bedroom walls which were in the background, that's something I could only have dreamed of at the time!

13 June 2012

Cats, dustbin liners, 1959 and all that.....

Templecombe's 43216 is captured pottering about the sidings at Catcott Burtle on a bright but blustery day in magnificent summer of 1959.  Click on the photo to get a bigger view.

'59 was very similar to the summer of 2006, with hot temperatures and wall to wall sunshine running well into the autumn. This is probably one of the reasons why there are so many colour photographs from that year, colour films like Kodachrome 1 from that era being generally very slow and totally unsuitable for photography of moving trains unless the sun was out. Cameras in the 1950's compared to today where very expensive, especially if you wanted something with a lens faster than f2.8 which would have been needed to get a high enough shutter speed to stop a fast moving train on the mainline, even with the sun out much of the time.

Catcott has been wrapped up since last autumn in a cat proof cocoon of black dustbin liners, mostly to stop Saffy our British Short Har from chewing the tops off signal posts. This she has done this twice, I'm not really sure of the attraction of etched brass and white metal, it's not as if she's teething and the vet gave her a clean bill of health just the other day at great expense. Why is it that cats always go for the bit that cost the most in time and skills?

Cats aside, keeping the layout wrapped up has also kept it nice and fresh, dust being one of the main things that make a layout look tired, that and direct sunlight. Some think that dust makes a layout more realistic, the problem is that good lighting and a camera show it for what it is, 12 inch to the foot fluff and dead skin, mostly the latter I hasten to add! Tip: 'economy' black dustbin liners, split down either side make great lightweight layout covers that won't damage what's underneath.

Since doing up the Bachmann Midland 3F I haven't had a chance to show it off on my rose-tinted portrayal of 'The Branch' (the home of the real engine for many years), so this was one of the reasons to get the layout out, as well as trying out a new 35mm f2 Nikkor which focuses extraordinarily close for such a lens, the result being the above. It will make a good partner to my 55mm Micro-Nikkor.

21 April 2012

Powering Along the Mainline

It's a misty October morning in 1957, as and LMS 2P 4-4-0 is captured powering along the Midland Mainline a few miles south of Ambergate (location suggested by Model Rail's Ben Jones). Although it's misty, it appears to be a 2 coach train which to 40564 will be light work for such a graceful athletic engine.

Of course this is a model, quite an old one in fact, it being an ex-Mainline loco dating back to the mid-1980's. But proportion wise I think it's spot on, with it capturing the look and feel of these elegant machines so very well. The drive is one of those rubbish tender drive units, so less said about that the better, but Hornby have recently re-released this loco with a proper loco-drive, so I might will invest in one just for the chassis, that's if the new tooling matches the old.

The track is Peco code 75, but some proper chaired bullhead from the likes of C&L might be better for this period set piece along the addition of some fishplates to suggest 60 foot sections of track. I will add the fishplates in due course - time permitting! Flatbottomed rail started to be used in Britain from around 1950, so it's not too far off, but unlikely to have been seen on the outer slow lines in the mid-1950's.

04 April 2012

Post Closure Combwich

End of the line, September 1973, a contractor's Planet 'Fleur' terminates at Combwich in preparation for removal of any salvageable scrap prior to track removal.

Taken with natural window light falling length-wise along the layout from the right, giving an interesting effect because it breaks rules. I don't always like rules.

03 April 2012

Ode to Gifford!

Tuesday morning's photo I dedicate to Colin Gifford who changed the way railways were photographed in the 1960's. Until then photographers had recorded trains mostly as a strict 3/4 view, Mr Gifford changed that forever with the publication of Decline of Steam and Each a Glimpse. The latter book is rumoured to be re-released shortly with some new photography, and it will be interesting to see whether he influences modern railway photographers who in recent years have fequently been happy to settle for that 3/4 view again.

The photo above was taken on Cement Quay, the Ruston Bacyrus in the background standing on a temporary pile of sand for this shot.

26 March 2012

Tea or Tobacco?

66078 Hitchin - Cardiff Tidal scrap. Lower Basildon Friday 3 September 2010

From time to time a few mates and I get together to photograph full sized trains. We call it 'railway photography', but to everybody else it's simply 'trainspotting', but with a camera of course. I hope to be doing a little of this in a couple of days as a break from snapping miniature chuffers, especially seeing that the outlook is great this coming week.

After snapping a passing freight train it's usual to gaze at the camera review screen noting the 'all important' loco number. To me what the train is carrying is often far more interesting, with open wagons like the ones here showing off their load perfectly. This train is the Hitchin to Cardiff Tidal scrap captured passing Lower Basildon in the Thames valley a couple of years ago, and if one imagines it in OO gauge, it looks like a load of tobacco or even tea leaves. We tend to think of scrap is big lumps of bent rusty metal, but what we see here is a lot finer and not maybe what would be expected.

Another thing modellers might find interesting is the way the wagons are bulging outwards, this is something rearly modelled, but could probably be achieved quite easily with something below the load to push the sides out.

All this demonstrates just how important it is to look at photos of the real thing and not simply imagine what things look like, for it's all too easy to make a model-of-a-model, or a model-of-supposition which can be wrong - we all do it, I've done it loads of times. For example, how many people think that water is blue? It rarely is unless looking out at the open sea when the sky is clear and blue.

Here is a bigger view of the above photo.

23 March 2012

The Old Days!

8404_smrs_expo_019 by nevardmedia
8404_smrs_expo_019, a photo by nevardmedia on Flickr.
Earlier today I decided to upload a few 35mm negative scans of toy chuffers taken between 1981 and 1984. Many of them were taken down the long gone Southampton Model Railway Society clubrooms at Sholing Railway Station which housed Newhampton, a huge OO gauge out and back and duck under Southampton Terminus inspired layout. I remember that the standard of modelling at the time was generally a cut above the norm, with the miniature portrayal of the real Southampton Terminus buildings being quite stunning. I believe this layout still exists in private ownership, but would love to know if it is still operational. Newhampton's legacy lives on with Romsey which is built to a similar standard, and only recently retired from the exhibition circuit.

Another nice little SMRS layout featured is Overcombe, a ficticious OO gauge 'could have been' branchline terminus up in the hills above Weymouth, I recall it even had a ball clay working. This layout I gather still exists too, and I wonder if the ball clay transfer shed is still in one piece that I built all those years ago? In those days I used kitchen foil that had been textured with a ball point pen in close parallel lines to create the effect of corrugated iron.

Most of the other photos were taken at various railway exhibitions in the south-east, with the pinnacle seeing Chiltern Green & Luton Hoo in N gauge & 2 mm scale by The Model Railway Club at the IMREX event at Wembley in 1984. This layout really was impressive, and it was the first time I ever saw handbuilt 9mm gauge finescale track which looked incredibly fine and delicate. I've no idea if this layout still exists, but I believe this showing at IMREX was its last.

If anyone can add anything to the captions feel free, you can reply here, or if a Flickr member comment on the photograps directly. Some of the captions I admit are a bit of guesswork, and of course traditional film doesn't contain EXIF data like a digital photo for dating purposes!

07 March 2012

Rolleicords and mouldy rolls

Due to the Southampton Tunnel blockade, 33014 powers a diverted Portsmouth Harbour to Bristol train through Botley on a glorious Summer's day in June 1985. Bigger version here.

It's scary for me this think that this photo was taken over 25 years ago, because it does feel just like last summer. Looking ahead 25 years from now, and if I'm still alive I'll probably be in a bath chair or be one of those doddery rude old gits seen at railway shows that crash into you and push past your well behaved children. Failing that, I'll be that very slow driver in front of you and the 25 other cars on that windy route that you stand no chance of being able to overtake me on. Then later in the evening, my eyesight will be so bad I'll try to eat the floral pattern off the dinner plate, and I'll be always grumbling about the youth of today - actually I do that already! The youth bit, not the dinners plate. Yet.

I remember the day well, it was a comfortable 25 celcius or so, and I'd cycled the 8 or so miles from my parent's house in Hamble. At the time I was a photography student at Salisbury College of Art, and it was around the end of term so I'd probably gone home for the weekend. In those pre-internet days I'm not sure how I knew that the trains were being diverted away the more usual Netley route because of engineering work on the tunnel at Southampton, but there were a few railwaymen at the Southampton Model Railway Society I belonged to at the time who may have given me the nod. More likely though it was simply because I travelled by train quite a bit had seen the notices! It does make me think just how much we rely on the web these days for almost everything!

One thing that sticks on my mind from that sunny day, was the petrol station next to Botley railway station where I bought a cheese filled roll and a can of fizzy pop. When I chomped into it, the flavour was a bit like compost (not that I eat compost rgularly) and upon further investigation found the roll full of mould! I couldn't be bothered to go back to the garage, but I do recall the chap at the till saying that the fridge was up the spout. These days I'd not take such a risk and would certainly not put up with rotten food by taking it straight back.

The camera I used much time was a late 1950's Rolleicord Va, a trusty German built camera that shoots 12 x 6x6cm exposures on a roll of 120 film. The lens had a maximum aperture of only f3.5, so to be able to shoot at the 1/500 sec shutter speed to stop and fast moving train you needed sunlight for the 100 iso Fujichrome the above photo was taken on - this shot probably being 1/500 at f5.6. On overcast days whilst I could have chosen a fast transparency which generally was indifferent in quality and very grainy, so we tended to shoot black and white. For younger readers, black and white must seem odd, but in those days B&W was the norm for publication and home processing. Nearly all magazines and books apart from the posher ones and National Geographic were mostly B&W apart from the cover and maybe a centre spread.

The cameras and trains may have changed, and I'm certainly no longer that mug who bought rotten filled rolls, but interestingly enough this location looks quite similar which is still a stone off loading terminal for trains from the Mendips. Even the signalbox is still there, albeit semi-derelict and looking like it's not been painted since this photo was taken.

Here is the location on Google Maps, and the bridge I stood on - though I have not any idea how I found the footpath to it http://g.co/maps/pv6uq

24 December 2011

Secrets of Brewhouse Quay

Bachmann Midland 3F weathered and renumbered as Templecombe's 43216. This loco was the 3F allocated to the former Somerset & Dorset line and was withdrawn in 1962.

For photographers, this was taken on a mid-1960's Nikkor-S (Ai converted) 35mm f2.8 wide angle lens on a somewhat newer Nikon D700 digital body. 2 sec, f16, Adobe RAW/CS5 using the layout's own lighting. The only digital post production apart from basic level adjustment during the RAW conversion is the addition of fake smoke.

To find out a few secrets of Brewhouse Quay, click on the above photo to take you through to another photo, then float your cursor over the image for detail notes.

14 November 2011

'Doris' settling in

With the little Beattie Well Tank now in my possession I couldn't resist popping the little beauty on to Polbrock to see whether it fits in. On that note is 'it' a 'she' or 'he'? Presuming 'she' had a name, I think that 'Doris' would suit? That being the case, 'Doris' is all rather pristine and will in due course be given a little fake patina replicating a working engine rather than looking like a finalist in the X Factor. The trick with weathering is to create the effect of a working engine, but not make it look like it's been trashed and dropped in due-to-be-changed-cat litter - it's often a fine line. Maybe 'Kev' would be a better name for mucky engine?

The 'set' is of course my latest micro Polbrock, which is far from complete, but finished enough to use it as a prop to photograph stock on. Recent work being to tidy up some of the static grass around and between the rails. During application I over-diluted the PVA glue a little too much making some of the grass fibres fall over through lack of support, over thinned glue being limp like a manager promoted beyond his or her capability. It was an easy enough job to rub the almost horizontal fibres off and re-apply with some less diluted PVA about 2 parts glue to 1 part water. Now the freshly applied fibres stand up boldly unlike limp management.

Interestingly enough the grass fibres between the rails have no effect on running performance as long as they don't stray between the loco wheels and rail surface. A disposable razor run along the rail top is a good way to remove any stray fibres followed by a good vacuum and dusting of hair spray to keeping everything in place - you don't really want the little fibres getting in to engine mechanics.

For the shot here, the camera was resting on the level crossing and the scene lit with natural window light. A large pale blue board and my rolling stock photo plinth thingamajig were then placed in the background to hide the lack of proper backscene and domestic furniture! Later in Photoshop I replaced the blue board with a de-focussed actual sky because the pale blue wall had some shadows on it. The smoke is the only other embellishment. I'm looking forward to sorting out the proper backscene which will have a fuzzy, misty Cornish inspired landscape which will negate the need to mess about with bits of board and computer editing too much.
  • Bigger version of the above photo here.

16 October 2011

Model Railway Photography


60026 arrives at Cement Quay Old Wharf with a
and empty short rake of MFA high sided box
wagons. The loco will uncouple and run around
the train before propelling it under the screen for
loading. There is no computer Photoshop jiggery
pokery here, the sky is part of the layout painted
onto a nice hight curved backdrop, something that
 is worth considering if you intend to photograph
 your layout alot.
I'm always being questioned about photographing model railways, so here is a 'reprint' from an article I penned for Model Rail July 2008 issue. Cameras have moved on a little since then in that most are capable from producing a good quality A3 print, but the basic rules are the same - 'light it well, keep it still'.

After spending very many hours and money on creating your favourite railway item in miniature, it’s quite likely you’re going to want to record the outcome to share with the friends, on social media, your own website, or of course the model railway press!

The last decade has seen photography change enormously, with mega-pixels & digits replacing film emulsion in this increasingly digital world we live in. This for the casual snapper this has been nothing but a good thing, for now with even the most inexpensive digital camera, what was quite specialist photography is within the grasp of almost anybody.

OK, well, it’s not quite as simple as that, if it was I wouldn’t have written this guide! However, with a few simple rules and easy to grasp techniques, extraordinary good results can be had from the recent breed of high resolution small digital pocket cameras.

Let’s look at some of the key features that spoil good picture:


• Fuzzy?
• Noisy snowy pictures?
• Camera shake?
• Out of focus?
• Badly lit?
• Off colour?
• Too light or too dark?
• Subject too far away?

An out of the box Bachmann 3MT. This has been shot under the
layout's own built in flu lighting which gives nice even illumination.
Despite many manufacturers claiming that, ‘their’ camera will turn you into a brilliant photographer with little effort, some basic techniques and a little understanding of photography will help to give some credibility to their claims though ultimately framing and composition is very much down to the user.

Super fine, fine, ordinary?

Before we take any pictures, we need to be sure that what we record has the potential to be the best quality possible. Always use the finest and biggest – it really does matter! If you’re taking pictures for the printed page, always shoot at the best quality jpeg. The computer screen is quite forgiving, the printed page isn’t. If you’ve leant the camera to the kids or Aunty Mabel, the ‘ordinary’ quality will be fine, after all there’s no point in filling up precious memory with stuff you’ll probably delete anyway (with apologies to any Mabels out there that are top photographers). For serious photography, only ‘Superfine’ (this term may vary depending on camera make) will do. You’ll know when you’ve found it, because it will be the setting that gives you the least number of pictures on your card. Good things come at a price!

Size does matter!

Keep the camera still, the slightest movement
during exposure will spoil the shot
Indeed it does, well in digital photography anyway. Along with ‘superfine’ jpeg just discussed, you need to have the largest picture dimension selected, again as before, the printed page is far less forgiving than the computer screen. Most people have found this out when they try to print a picture from the internet, it looks great on the screen but terrible printed. The terms here are pretty straight forward. ‘L’ meaning ‘large’, ‘M’ for medium & ‘S’ for small. Forget the last two, large is the only option despite what the local pub know-all or salesman down the camera shop might tell you. Again, it’s as before, you know when you’ve found it because it will give you the least number of frames on your memory card!

Noisy snowy pictures?

With the flash turned off when in dark places, you might well find that you get snowy noisy looking pictures? This is because your camera has automatically boosted its sensitivity. Whilst this may be fine for that boozy snapshot down the pub, you probably won’t want to see this effect in your pictures. Check your camera instruction and you should be able to adjust the camera’s ISO, this being the international standard used to rate digital cameras and film’s sensitivity to light. Simply speaking, the lower the number (ISO) the less noisy or grainy the picture will appear. For this reason we need to ideally select the lowest ISO.

Camera shake?

A small bean bag is a great tool. It stops the
camera from damaging the layout and keeps the camera
nice and still

However steady handed you think you are, because we’re photographing something often close up, any movement will be amplified, making the slightest bit of camera shake looking like you took the picture during a 10 plus Richter scale earthquake! A tripod will always be a useful tool, however, if your interest in photography is only passing, understandably it’s unlikely you’ll want to invest in such. There are other options, you could try resting the camera on a cushion or table. A small bag of rice or purpose made bean bag can be very useful (get somebody nifty with a sewing machine or buy a purpose made one), it allowing you to adjust the angle of the camera with little effort.

A nifty trick is to find the camera’s ‘self timer’, that’s the setting you use when you want to do that self portrait whilst on holiday. OK, the idea isn’t that you do a self portrait of you and your favourite piece (well, you can if you like!), use the tool to fire off the camera without touching it – thus reducing the chance of camera shake when the shutter opens. Obviously the camera needs to be supported so that bean bag or bag of rice already mentioned will be ideal!

Out of focus?

Must modern digital cameras will focus very close indeed with their built in auto focus. For real close-ups, you’ll probably need to select ‘macro’ mode, this is often via a button with a ‘tulip’ icon depending on brand of camera. If unsure, check the camera instructions.

Some cameras will allow you to turn the auto focus off. If you have this option, which will again depend on make and model, this will have the advantage of letting you focus exactly where you want to. Another option is to point the camera at the part of the item you want in sharp focus, half press the shutter release (which will set the focus), then with your finger still half pressing the shutter release recompose the shot to the angle you want then fully depress the shutter release. If you’re using the self timer, you can fully press the shutter release button before recomposing, the 10 second delay giving you lots of time.

Mendip is captured mid-take at Catcott during the
making of 'The Return of the Titfield Thunderbolt'
during the late summer of 1956. Of course that's
complete tosh, but I can tell you that the is no computer
addition other than the splirt of smoke from the engine,
 which was added using the 'clouds' filter in Photoshop.
 How do I get more of the picture in focus?

This will again depend on your camera make and model. With many makes, you can set the camera into ‘aperture priority’ mode, this is often displayed as ‘AV’. With this setting you can select a small aperture.

What’s all this small aperture thing? The aperture is an iris much like in ones eye, hold a finger up to your eye and really squint, you’ll notice that you might even be able to see your eyelashes, finger and background all more or less in focus. Choosing a small aperture does the same thing, meaning far more of the picture will be in focus – just what we want! This is known as ‘depth or field’, aperture is normally marked up as numbers, the higher the number, the greater the ‘depth of field’.

Some of the simpler cameras will not let you have any control over aperture or shutter, user changes being via ‘scene modes’ where you select the type of picture you want to take. There are usually modes for ‘sport’, ‘portraits’, ‘landscapes’ fireworks, but sadly no mode for model railway close ups! For this reason you may have a problem getting the camera to select a small aperture for the close ups. However, if you can take your model out side into brighter light, it’s quite likely that the camera’s computer will select a smaller aperture.

If you have yet to buy a small digital camera, and you intend to do quite a bit of model railway photography, it would be a good idea to choose a camera that allows you to have control over the aperture setting.

Badly lit?

You must turn that flash off, direct camera flash doesn’t have a place in our world. Whilst it might be fine for family snaps, it will generally not do our model making any favours, creating flat and quite often washed out pictures with no depth. This can usually be controlled by a button with a ‘lightning’ icon somewhere on the camera.

Getting your subject properly lit, the simplest way, is to take your model outside where the light is good. Overcast and sunshine work well in this respect, both giving different but equally good results.
Another option, especially if photographing a model railway, or using one as a backdrop for an engine or train, is to use the layout’s own lighting. Digital cameras generally have quite good automatic white balance control, which like the eye, should adapt to the lighting on the layout - more on white balance in a moment.

Too light or too dark?

It’s possible that the camera metering is being effected by something very bright or dark within the picture. Photographing a dark engine against a white background or visa versa will do this. Check your camera instructions to see if you can use manual exposure ‘M’ or exposure compensation (often marked as a +/- button).

Off colour?
The resulting photo from the set up below. The computer
smoke is optional of course.

The trick when doing this is to experiment a little, after all, cameras and lighting will vary. Sometimes the automatic white balance will refuse to work as well as you like, when this happens, you might want to experiment with some of the white balance ‘pre sets’, again look at your camera manual. White balance settings are often embedded in one of the menus, and will usually be indicated up with simple icons to reflect the type of light you are trying to balance for. Fluorescent lighting and the new ‘energy saver’ bulbs are the ones most likely to cause issue, due to there being so many different types. Some cameras will also allow you to balance for your specific light using a sheet of white paper in the scene prior to taking pictures.

One thing you cannot do, however clever your camera, is to mix different types of light. Daylight does not mix with tungsten, it being very blue and the latter very orange. The same problem occurs when trying to mix fluorescent lighting which can be very green. Keeping to just one type of light gets around this, the camera can only correct for one type at a time.

What makes a good picture?

Try photographing your trains against a simple back ground.
A large print was used here with the light coming in from the
garden. Note the tin foil to reflect a little light into 
the shadows.
If you’re photographing an item of rolling stock or engine which isn’t on a layout, try to place it in front of a background which isn’t too busy or distracting. Its simplest form can be placing the subject on a length of clean new track in front of a large sheet of curved paper.

Fill the frame, there’s no point in having a picture which needs to be enlarged at a later stage. Rather than zooming into your subject from far way, keep the zoom wide and fill the frame, you will get a more natural perspective.

Make sure your subject is totally dust free – I’m mean totally! The smallest amount of dust or fluff will really spoil a model.
Digital is a great tool, you can analyse the photographic progress as you go along, adjusting brightness, colour and focus then deleting sub standard images and correcting errors as many times as necessary. These cameras can also be very useful for checking progress of model making, sometimes errors and blemishes only show up when you see them on the back of the camera or computer screen. Because the camera is totally unforgiving, it can help us become more critical and better model maker - hopefully!

Useful camera purchase tips
• Buy a camera that has proper ‘aperture priority’, ‘scene modes’ are unlikely to offer enough flexibility.
• 5 mega pixels should be your minimum resolution.
• Mobile phone cameras are no substitute for a proper camera.
• Get a decent sized memory card, the one often supplied is too small when shooting at the highest resolution and picture size.
• Check out camera reviews online prior to purchasing. www.dpreview.com is a favourite, for not only can you download full size image files, you can also compare specs and performance between models.

Sharp tips for sharpshooters
• Fill the frame!
• Keep the camera totally still, rest it on something, tripod, bean bag? Use the ‘self timer’ for hands free operation.
• Select ‘macro’ for close up work.
• Turn that flash off! Light your subject properly, daylight is free and ideal! Experiment with your layout’s own lighting too.
• Check your white balance, ‘auto’ may not always be best – experiment with other settings.
• Use the lowest ISO to minimise noise.
• Always use ‘superfine’ and ‘large’ – size really does matter!
• Get rid of that dust and thumb print on the lens!
• Make sure your subject is clean dust free!

03 September 2011

Publicity Photo

This morning's rose tinted load of old tosh ....

This colour publicity shot was taken around 1964 of Sentinel 'Mendip' involved in a major cask movement during the change over from wood to metal casks at the Marriott, Dent & Foster Brewery in Bath. The gentleman posing behind one the casks is thought to be Lord Marriott de Shenley, one the leading lights at the brewery. A note on the transleeve says 'Ektachrome X, Mamiya C3, 55mm Sekor.'

Bigger version: http://www.flickr.com/photos/nevardmedia/6107287719/sizes/o/in/photostream/