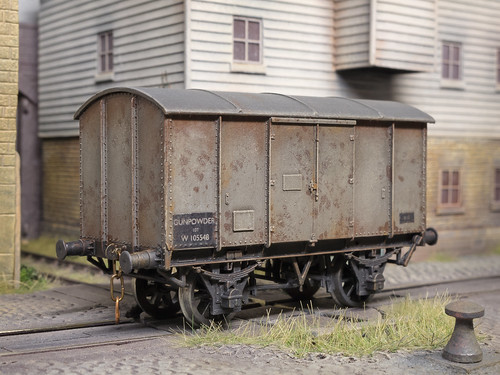
This afternoon I finally finished the Parkside Dundas (PC86) GWR 10 Ton Gunpowder Van Z2 kit that's been in the workbench for a few weeks.
The lettering/numbering is homegrown and a chance to try out the Crafty Computer Paper DIY transfer sheets.
Painting and weathering is my usual build up of washes, blobs of paint and dry brushing. I prefer to work this way over airbrushing these days. These steel bodied wagons are always a joy to replicate with the tin worm which took over due to our wet climate.

About Me
- Chris Nevard Model Railways & Photography
- Professional Photographer, Model Maker, Writer & Pretend Musician
Sunday 18 November 2012
Tuesday 13 November 2012
Technique: Quick Cobbles
 |
| Cobbled yards are quite easy to do when you know how. The delighful little loco here was loaned by Tim Maddocks, see his website at www.enginewood.co.uk |
Or you can use this method which is quick, easy and ensures a degree of sanity can remain in this already loopy hobby of ours.
First add a layer of Das modelling clay; if the surface is smooth, paint on a little white glue first to help the clay adhere. Use a beer bottle (drink the contents first if you like, or save to the end as a reward) to roll the clay into place if it helps.
Fingers and a stiff brush can also be used to pummel the clay into place. Don't do too big an area in one go because the clay will set, time depending on whether you're here in the UK in a cold damp shed at the bottom of the garden or in California in a tin roofed garage. Do a test first to see what suits you and your environment.
Where the clay butts up against the track, keep it a little lower than the rail head (approx 1mm), this will make cleaning the track easier and will minimise the chance of damaging the cobbles with a track rubber.


This whole area (3ft x 18 inches) was about 3 hours work including the painting (not including the overnight Das drying time).
Open another beer.....
Roving Camera 3: Warren Lane

As you’d expect the container gantries all function via remote, so trains as they come and go can be loaded and unloaded which adds interest beyond that of trains simply coming and going.
We often tend the think of ‘modern image’ model railway buffs as box openers rather than modellers, the Warren Lane team buck this, with nearly everything being scratchbuilt, from the overhead electric catenary right through to many of the specialist road vehicles designed for moving the containers about the terminal. The working gantries are Heljan, but they have been cleverly repainted into Freightliner colours to remove them as far as possible from out of the box condition.
Enough from me, take a look at the dedicated website at www.warrenlane.co.uk and pick up a back copy of the June 2010 issue of Model Rail Magazine
Monday 12 November 2012
My Workbench
Many people presume that I have some kind of dedicated workbench area for my various projects, but I'm not really a fan of hiding away in some little boxroom, preferring daylight and being around my nearest and dearest.
Above is the 'workbench' used for much of the construction of Brewhouse Quay, in this case being the dining room table. Being good you might notice the rug used to protect the wooden surface from scratches, but you may also notice that I was probably going to be told off for not putting a mat under the tea cup, especially seeing it appears to have slopped a little.
As always Fleur (pussy cat) like to get involved with what's going especially seiing I'd just plugged the soldering iron in to heat up - bless.
Benchvent, suppliers of hobby extractors are currently running a competition for workbench photos, this spurred the above photo to be extracted from the bowels of my photo-archive....
http://www.benchvent.com/blog/show-us-your-workspace-and-win-an-exagon-r/
Thursday 8 November 2012
View from the fiddle yard
I'm always keen to try out new angles on my layouts, and it's after exhibiting Brewhouse Quay at Wycrail last weekend became aware of this never before tried view from one of the other fiddle yard exit points on BQ when messing about at the show with a camera. In fact unless one has a really small head it's not possible to see this, but today's little high quality cameras can get into all sorts of places- ohhh errrr.....
Note how the canopy has been cut back over the years, the most recent modifications since the local take over of local line by the BR Western Region with their even bigger locos. Well, that's my story, but in reality I should have mounted the building a tad higher! Still, this osrt of thing happened in eal life!
30587 after residing at Eastleigh for a few months in 62/63 after finishing on the Wenfordbridge line, ended shunting Brewhouse Quay sidings until the late 1960's - its short wheelbase and nimble frame being ideal for this little known brewery railway network. Shortly after this photo was taken, the engine was painted green, lined out and named 'Mashtun'.
Monday 5 November 2012
Wycrail - Jolly Good!
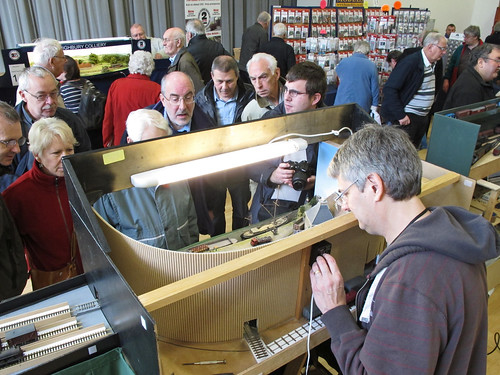
Well, that was Wycrail that was! As what a fun day it was too at the brand new and even dare I say slightly stylish location of the Cressex Community School on Aylesbury. The location, well the bits put aside for the show anyway had more in common with that of a modern trade show facility than a a school, which meant lots of light, high ceilings and plenty of space, a contrast to the location of previous years which has simply been outgrown due to the success of the show.
Ian Mellors, that's him by the way in the shot above, very kindly gave up his Saturday and travelled all the way down from Mansfield to help play trains. This is the third year in a row that I've been in dept to Ian for his assistance, so as soon as he gets his new O gauge layout onto the road I hope to return the favour many times over.
Brewhouse Quay, or 'BQ' as I call it behaved as it should, even the wagon turntable shunt worked most of the time, but I really must address the doors that the wagon exit through backscene (seen just to the left of Ian's hand), it's a little too tight for comfort.
Enough for now. I'm in a but of a rush, but here's to Wycrail '13, and if you want to see the wagon tuntable in action, go here http://www.youtube.com/watch?v=PP1UA4ZxN6A&list=UUPN8LPbSP1wCVX3zr2jSf2Q&index=2&feature=plcp
Thursday 1 November 2012
Model Rail - December 2012 (173)
Model Rail Day has come around again!

Visit the Model Rail website to order your copy, or pop down to the shops!
Some preview shots of the wonderful layouts within - all based on real locations!

- Review: Dapol 57XX 0-6-0PT in N
- Hornby 'Maple Leaf' Class 67
- N Gauge Society LMS saloon
- Dapol O gauge open wagons
- Bachmann 'Improved Director' 4-4-0
- Truetexture lasercut window frames
- Hornby Class 92
- Graham Farish autoballaster in N
- Layout: Medstead & Four Marks layout in OO
- 6 x 4 by Paul Lunn
- Layout: Dduallt - FR layout in OO9
- How to:
- Use filler
- Detail a tank wagon kit - George Dent
- Finish a 'Q1' loco - Spencer Pollard
- Em-bell-ish an 'A4' - Chris Leigh (inspired by 60010)
- Easy evening projects - Peter Marriott
- Detail a budget diesel - George Dent
- Model Rail meets Ian Futers
- Wheels of Steel - Ben Ando
- Layout:Liverpool Lime Street EM gauge layout
- Q&A
- Show and Tell
- George's Modelling Diary
- Backscene
Visit the Model Rail website to order your copy, or pop down to the shops!
Some preview shots of the wonderful layouts within - all based on real locations!
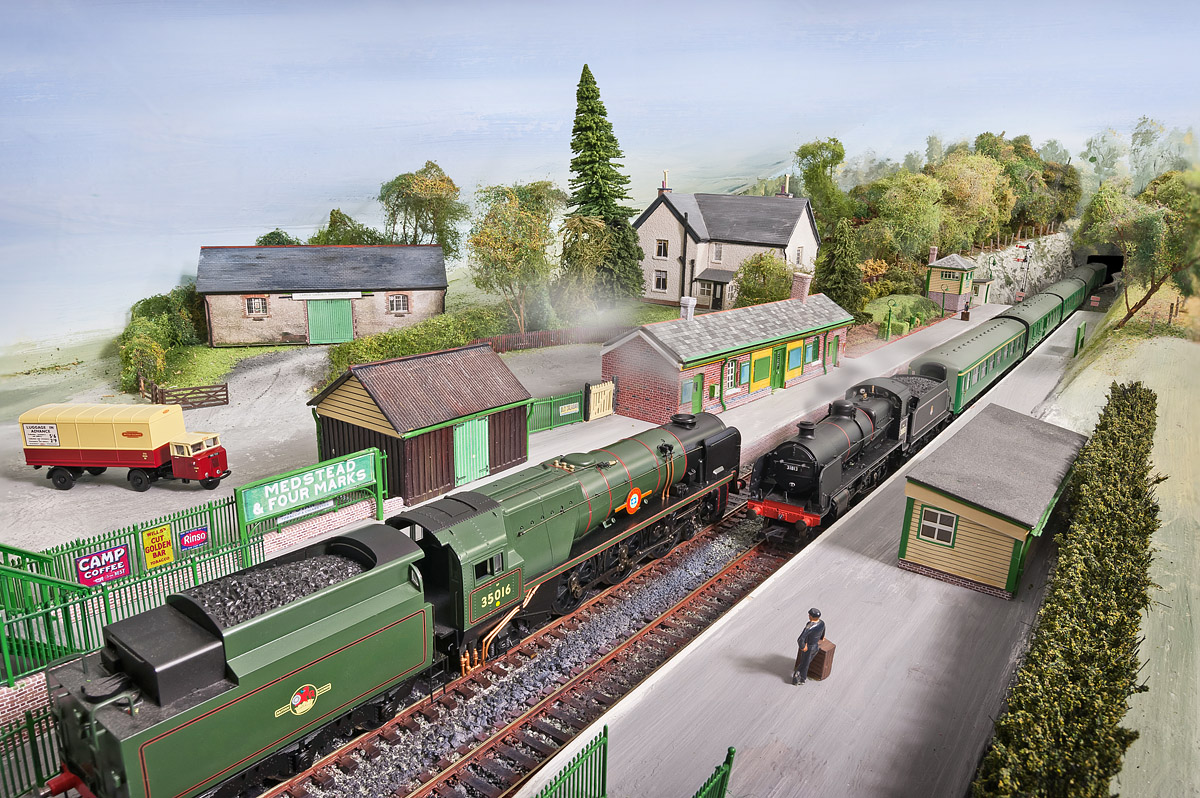 |
| Medstead & Four Marks - photo: Chris Nevard/Model Rail |
 |
| Dduallt - photo: Chris Nevard/Model Rail |
 |
| Liverpool Lime Street - photo: Chris Nevard/Model Rail |
Subscribe to:
Posts (Atom)