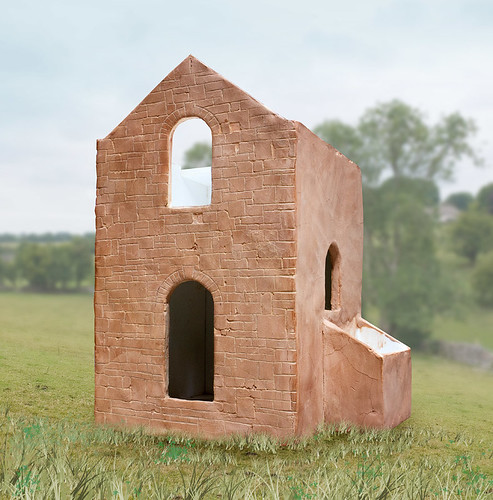
Rather than clad the Cornish Engine currently on the workbench as part of my Mendip Colliery project (posed with a bit of CGI in the form of Priddy in Somerset very near to the caver's Mecca of Swildon's Hole in fact) in embossed stone effect sheets, I wanted a more rustic random effect. There's only one way to do this, and that is to carve each stone individually using a sharp object into a surface that will take such abuse - which in this case is Humbrol Air Clay.
Obviously the colour is way off, it being the native red colour of the clay - this will be addressed in due course with paints and weathering. Some of the clay crumbled a little - something that I'm quite pleased because it's part of the effect I'm after, and something that could not be done with embossed plastic. The random cracking is also a useful 'feature' of Air Clay, to further the rustic effect.
To date I've only done this one wall leaving the rest of the structure to be done another day - infact something which is ideal for passing time by when supposedly doing something else like watching dull TV...

About Me
- Chris Nevard Model Railways & Photography
- Professional Photographer, Model Maker, Writer & Pretend Musician
Maybe you've also tried the likes of Wilkinson's plaster to which one can simply add water to achieve a consistency for spreading thinly over stiff card or, better still, hardboard or plywood.
ReplyDeleteFor making some attempts at stone walls for the Peak District setting of our fantasy Midland Railway layout http://derwentmidland.blogspot.com I also added some matt black paint to the plaster mix so that when the inevitable cracking and chipping takes place (sic) there was at least a grey depression and not a plaster white one.
As with your modelling clay, our stone walls, old field barn and viaduct all required quick scribing with a sharp scalpel (before the plaster dried of course) and then painting with several colours and shades to obtain something like the variety of tints in the local sandstone.
I'll be very interested to hear how you getting on with jointing new clay onto the old and seeing how well it weathers up!
Wetting the surface of the clay a little after it's dried allows one to scribe the surface easily with a sharp point. It's working well, I all four walls done now. Next job will be to treat the surface with PVA to protect and make it really solid prior to colouring.
ReplyDelete